The Ultimate Guide to the Zebra MC9300

Zebra MC9300 - Bar Code Depot

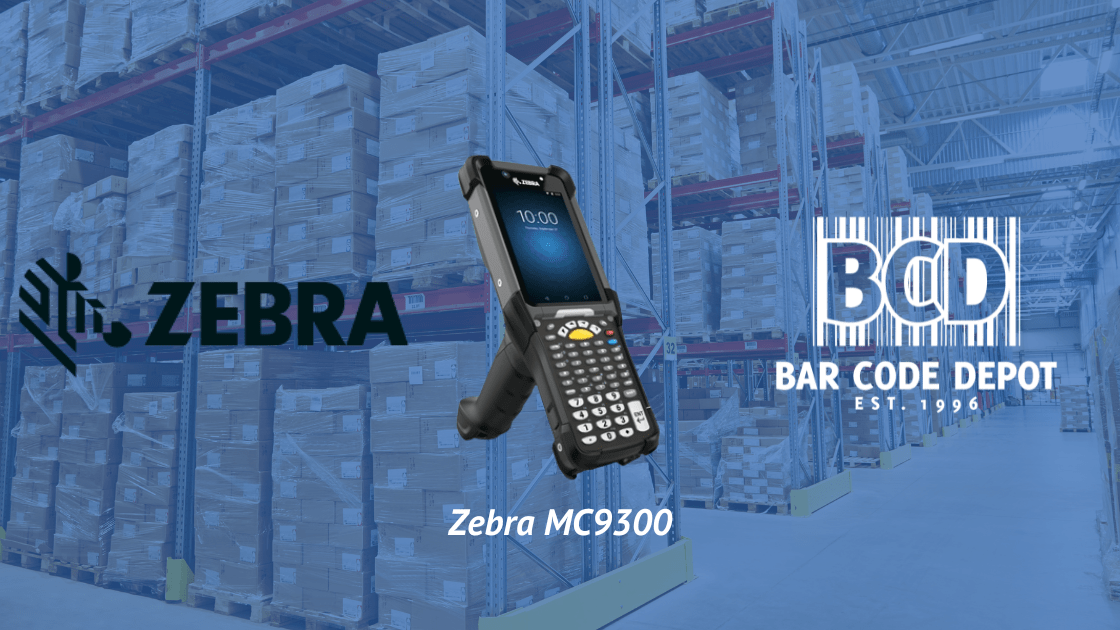
The Zebra MC9300 is a powerful scan gun that can help streamline operations and improve efficiency. However, it can be challenging to know how to get the most out of this device. That’s why we’ve created the ultimate guide to the Zebra MC9300. This guide will show you how to maximize the potential of this scanner in your warehouse operation. Whether you’re looking to improve accuracy or speed, this guide will provide all the information you need to make the most of your Zebra MC9300 scanner.


Introduction to the Zebra MC9300

The Zebra MC9300 is the ultimate tool for organizations needing to streamline business processes and drive efficiency. Built on the Android Enterprise platform, it provides a simple user experience yet packs plenty of strength. The uniquely designed device offers an exceptional scan range and supports optional modules, allowing workers to customize the MC9300 for their individual needs. With this powerful device designed for real-world applications, organizations can work faster, smarter, and with greater accuracy than ever before.


Different Applications for the Zebra MC9300

The Zebra MC9300 is a powerful tool that enables businesses to take their operations to the next level. The mobile computer can be used for receiving and put-away inventory management, returns processing, cross-dock operations, and EDI transactions and picking. This versatile productivity tool makes it easy to track, manage, and automate multiple processes with just one device -allowing businesses to improve accuracy while boosting throughput. With its robust operating system and omnidirectional RFID capabilities, the Zebra MC9300 is an ideal choice for on-the-go deployments where efficient tracking of stock is essential. Its intuitive user interface and custom apps let you create specific tasks tailored to your business needs.


An Advanced Modern Solution for your Operations

Are you looking to update your operations with an advanced modern solution? Look no further than the Zebra MC9300. With touchscreen and keypad input, this powerful device offers a wealth of capabilities that can easily help upgrade your operation. Its TE apps make it simple to transition from Windows to Android, allowing you to use the latest mobile technology available. Furthermore, the larger touchscreen has been outfitted with advanced technology for improved performance and user experience. Don’t wait – get the updated power of the Zebra MC9300 today!


Durability for the Toughest Environments

The Zebra MC9300 is designed and built to be the most rugged device in its class, ideal for businesses operating in the harshest environments. The device has IP67 sealing, meaning it’s waterproof, drop-proof, and dust-proof, offering superior reliability even after multiple tumbles and falls. The touchscreen is made of Corning Gorilla Glass which gives it extra protection and makes it resistant to wear and tear due to regular rough handling. The MC9300 is the toughest scan gun on the market today. Built for businesses that want a reliable competitive edge while working in tough conditions.


Conclusion

Concluding our ultimate guide for the Zebra MC9300, we can see that this reliable and tough mobile computer is the right choice for evolving customer demands. It provides cost-effectiveness, superior performance, and an enhanced user experience—all of which make it a standout device in any warehouse or enterprise environment. The quality and capability of the MC9300 make it an ideal solution for your handheld needs, taking advantage of its advanced features while delivering dependable power and affordability. Reliable, tough, and cost-effective—the MC9300 is a brilliant choice to meet your business’s needs!

Contact us today to learn more!

3 Ways Automation Enhanced Worker Safety on the Production Floor

3 Ways Automation Enhanced Worker Safety on the Production Floor

Rising shipping and delivery demands require businesses to implement automation solutions that can redefine warehouse operations. This is because the right automation solutions can revolutionize supply chains with real-time visibility and improved productivity, even during labor shortages. Studies indicate that nine in 10  decision-makers expect to seek outside resources to help identify and execute warehouse optimization and automation solutions. Implementing automation solutions can also significantly enhance worker safety, as studies estimate that 84%  of decision-makers feel it would be safe to have warehouse associates work alongside robotics solutions. It’s even more important to enhance worker safety during labor shortages, but with increasing challenges for social distancing, real-time alerts, and faster workflows, it’s virtually mandatory. Shortages prevent faster workflows and real-time alerts which causes workforce safety and productivity to decline. To combat this, warehouses are turning to asset tracking solutions like RFID and wireless connectivity solutions.


Ensure safety and productivity with Bar Code Depot and Zebra.

Enhancing safety on the production floor starts with a more connected workforce with real-time visibility into operations. This is achievable by implementing RFID solutions and wireless connectivity solutions. That’s why Bar Code Depot and Zebra partner to bring innovative RFID and wireless connectivity solutions that implement real-time alerts and faster workflows to help ensure worker safety and meet the demands of labor shortages. Bar Code Depot and Zebra’s hands-free technology solutions enhance worker safety on the production floor with…


  1. Redefined team decision-making and streamlined connectivity – Empowering your production floor with real-time communication access wherever and whenever they help connect the workforce to stay safe. Equip your workers with secured messaging and push-to-talk capabilities that achieve this with Zebra’s Workforce Connect. This solution unifies different departments onto a single platform for easier data access to help them make informed decisions.
  2. Improved accuracy and visibility with enterprise-class printing – Tracking your assets in real-time with RFID technology helps distributors avoid unnecessary errors and reduce out-of-stocks to improve productivity and safety on the production floor. This can be ensured with reliable label and tag printing options, like Zebra’s ZT600 RFID industrial printers, that deliver real-time data to your workers and help them accurately print and encode RAIN RFID labels, tags, and cards where and when they need to. This helps simplify warehouse management and reduce distribution expenses.
  3. Reliable data capture capabilities and flexibility – Implementing best-in-class RFID read performance, like Zebra’s MC3330xR RFID reader, helps redefine inventory management with a new level of efficiency and accuracy. Faster capture and an expanded range for reading barcodes help improve social distancing, create smoother workflows, and give workers real-time data access. Empowering a more efficient data capture process with handheld RFID readers boosts safety and productivity on your production floor because workers are more aware of and capable of completing tasks.


Enhance production safety with automation solutions that deliver smoother workflows and real-time data access. Contact Bar Code Depot to keep your workers safe.

The Labor Shortage is Still Impacting the Supply Chain. Here’s what COOs are doing about it:


The Labor Shortage is Still Impacting the Supply Chain. Here’s what COOs are doing about it:


The supply chain has shifted dramatically in recent years. As higher demands for shipping and warehousing continue to increase 25-50% every year, there is now a 43% turnover rate in the warehouse. Labor shortages prevent the supply chain from adapting to rising shipping demands by slowing workflows and preventing data access. These rising demands and higher turnover rates cost warehouses at least $365,000 a year. Therefore, without solutions that manage these challenges, that number will only continue to rise and cause higher downtime and wasted productivity. To meet higher demands and the still ongoing labor shortage, supply chain COO’s are implementing automation solutions that prioritize adaptability and ease-of-use. The current labor shortage keeps workers tied to mainstream tasks instead of working on more important ones. However, the right automation solutions effectively automate mainstream tasks like data capture to free up workers and create smoother workflows.


Build a powerful and prepared supply chain with Bar Code Depot and Zebra.


Meeting the demands of labor shortages starts with implementing automation solutions that can deliver accurate data capture to help create efficient workflows. Consequently, more decision-makers now gravitate towards systems that improve data access with…


  1. Enhanced asset tracking and data capture accuracy – Labor shortages cause ineffective asset tracking that costs businesses thousands of dollars annually. Fortunately, you can gain more accurate and enhanced data capture capabilities with Zebra’s ET51 enterprise tablets. Enterprise tablets deliver higher durability, simple mobility, enterprise-class scanning, and a flexible design for your company’s needs. This gives your workers consistent, real-time access to valuable insights for better decision-making and faster workflows. This helps improve productivity even during labor shortages to maintain an accurate inventory and efficient distribution process.
  2. Reduced expenses through superior reliability – Reducing downtime and labor costs can help minimize the impacts of labor shortages. Purpose-built mobile devices, like Zebra’s MC3300 mobile computers, that come equipped with rugged IP54 sealing and 5 ft. drop specifications can handle challenging environments to reduce downtime and keep workflows smooth. Rugged devices also ensure that workers are equipped with the technology they need to complete important tasks.
  3. Higher RFID label and tag printing accuracy – More distributors are turning to RFID technology that can help avoid unnecessary errors and empower insight into business operations. Enhanced data insight into supply chain workflows can help speed up operations to minimize errors and improve productivity, which minimizes labor shortage challenges. This can be achieved with reliable label and tag printing options, like Zebra’s ZT600 RFID industrial printers, that accurately print and encode RAIN RFID labels, tags, and cards where and when workers need to, which empowers supply chains with consistent real-time data access.


Supply chains suffering from the impacts of labor shortages can reduce errors and labor costs with the right technology. Contact Bar Code Depot for reliable automation solutions that help maximize your distribution operations.


Shipping demands and labor turnover rates continue to rise.

Streamline accuracy and reduce labor costs with Bar Code Depot and Zebra’s innovative automation solutions.

Rugged Tablets – Zebra L10 Series

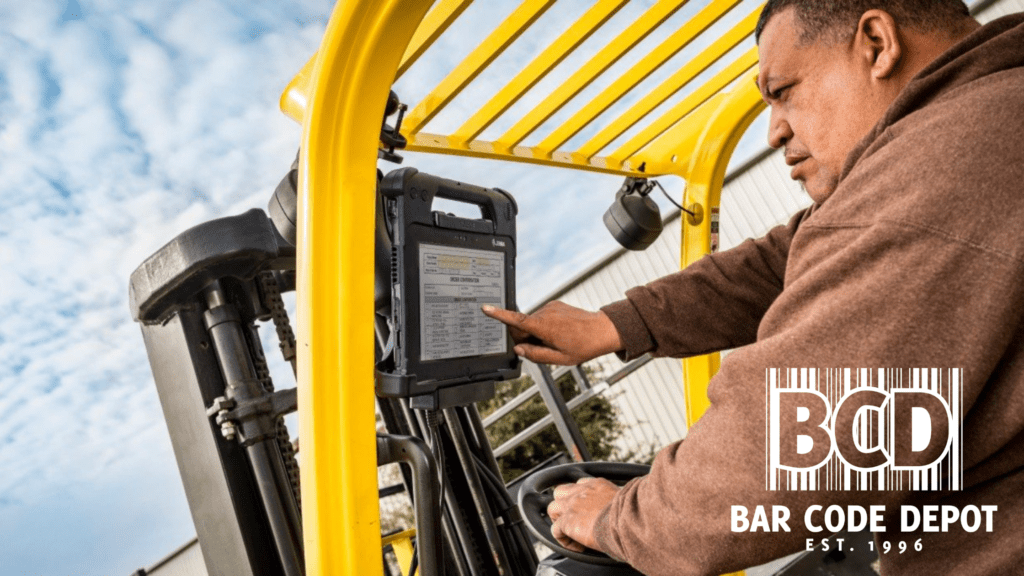
Forklift operator using the Zebra Xpad L10 Rugged Tablet

The Lineup

Zebra offers three different configurations of their rugged tablet lineup. Whether you’re looking for Zebra rugged tablets for your warehouse forklifts, manufacturing plant, or field mobility application one of these configurations will be perfect for you. All three configurations come with the ability to be either Windows or Android operating systems. All three tablets come standard with a hot-swappable battery making long days out in the field or long shifts in the warehouse even easier. There is also an extended life battery option that provides over 24 hours of continuous power. Let’s analyze these Zebra L10 Rugged tablets and help you determine which one is right for you.

XSLATE L10 Rugged Tablet

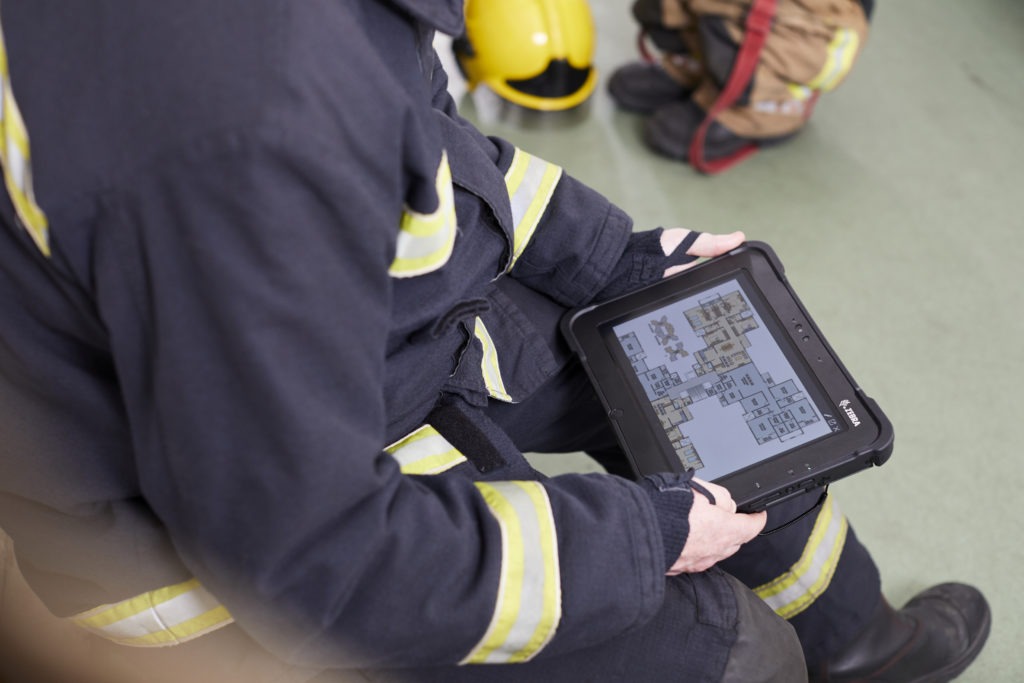
Firefighter using Zebra XSLATE L10 Rugged Tablet

The first of the Zebra tablets is the XSLATE L10. This setup is the most basic of the three. It doesn’t have any attachments connected to it making it the lightest option of the three. This Zebra tablet is perfect for public safety, utility fieldwork, and manufacturing. One of the key features of the XSLATE L10 is the durability. It is rated for a 6ft. drop and goes through rigorous testing while also maintaining its IP65 rating with the port doors open.

Key Specs of the XSLATE L10 Rugged Tablet:

  • Up to 26 hours of battery with the extened battery option
  • Hot swappable battery
  • Memory/Storage – 4GB/64GB or 8GB/128GB eMMC
  • Operating Temp: -4 F to 140 F / -20 C to 60 C
  • 10.1 in 2K resolution display
  • Glove and Wet Touch
  • Corning Gorilla Glass 3 Damge Protection

Click the link to see the full XSLATE L10 Spec Sheet

If you work in a warehouse or out in the field you understand there’s nothing more frustrating than running low on battery life in the middle of a shift. Not to mention if it’s in harsh conditions like sub-zero fridges or on a cold rainy day in the field. The XSLATE L10 Rugged Tablet mitigates all the most frustrating parts of your job and makes them a thing of the past. The aggregate of these numerous features makes your job easier and more productive than ever before. You’ll be sure to love the reliability and durability of all Zebra Rugged tablets.

The bottomline:

The Zebra XSLATE L10 Rugged tablet is perfect for the manufacturing floor, warehouse, telecommunications, mining, public safety, etc. Whatever industry you are in you can find an application for the Zebra Rugged tablets. If you would like to learn more about Zebra Rugged tablets or would even like a Demo please feel free to contact us and one of our knowledgeable and friendly reps will be in contact with you shortly.

XPAD L10 Rugged Tablet

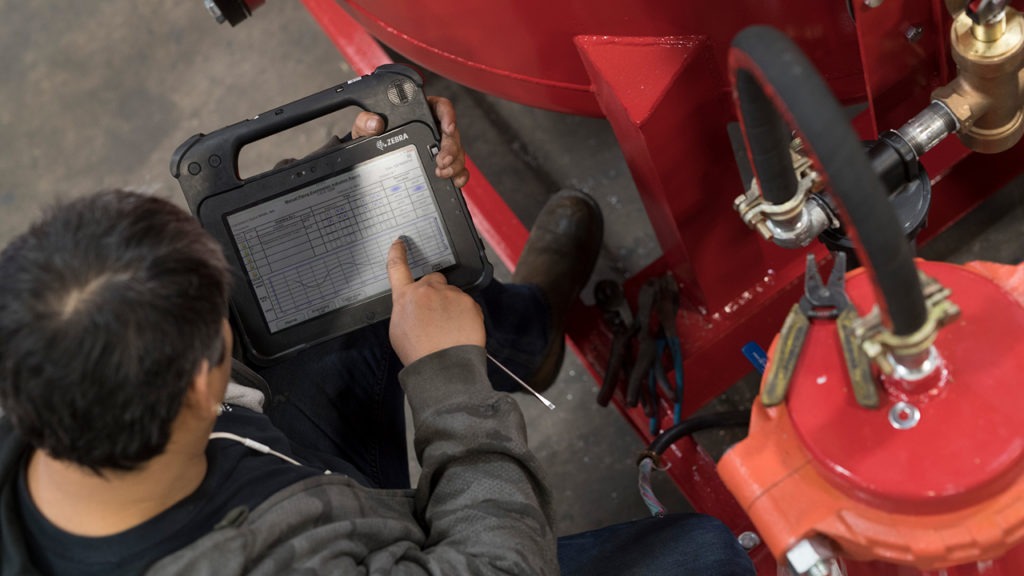
Field mobility application

The second rugged tablet offering from Zebra is the XPAD L10. The key differentiator with the XPAD is the ergonomically designed handle. Another feature that separates the XPAD from other rugged tablets is the built-in barcode scanner in the handle. This greatly expedites data input as well as verification tasks giving you more time to focus on other important tasks. The ideal applications for the XPAD are Public Safety, Construction, Oil and Gas, and Utilities. But can serve other industries as well if you would like to learn more about the Zerba XPAD L10 feel free to contact us anytime we’ll get back to you ASAP.

Key Specs of the XPAD L10 Rugged Tablet:

  • 3.1 lbs. / 1.4kg^2
  • 10.1 in. 2K resolution display
  • 1000 Nit Screen
  • Hot Swappable Battery
  • Up to 26 hours of battery life with extended option
  • Android or Windows OS
  • 13MP Rear Camera w/ AutoFocus
  • Zebra Scan Engine 4710 1D/2D imager

Click here to see the full XPAD L10 Spec Sheet

If you’re used to strenuous data entry and would like to speed up this tedious process the XPAD is the rugged tablet for you. With its built-in Zebra 1D/2D Imager you’ll be able to scan regular linear barcodes as well as QR codes. This will greatly accelerate productivity and not to mention give you more time for other important tasks. Another great feature of the XPAD L10 is the ergonomic handle, which, allows for easy transport. The XPAD L10 can also be mounted to a forklift for warehouse applications. The versatility of the XPAD might be its greatest feature there are numerous accessories as well for other applications as well. If you would like to learn more about the XPAD L10 rugged tablet, please contact us and we’ll get back to you ASAP.

The Bottomline:

No matter what industry you’re in if you’re ready to boost productivity and make frustrating tech a thing of the past then the XPAD L10 is for you. With its durability and long-lasting hot-swappable battery, gone are the days of running out of battery in the middle of a shift, these Rugged tablets will pay great dividends for your operation for years to come.

XBOOK L10 2-in-1 Rugged Tablet

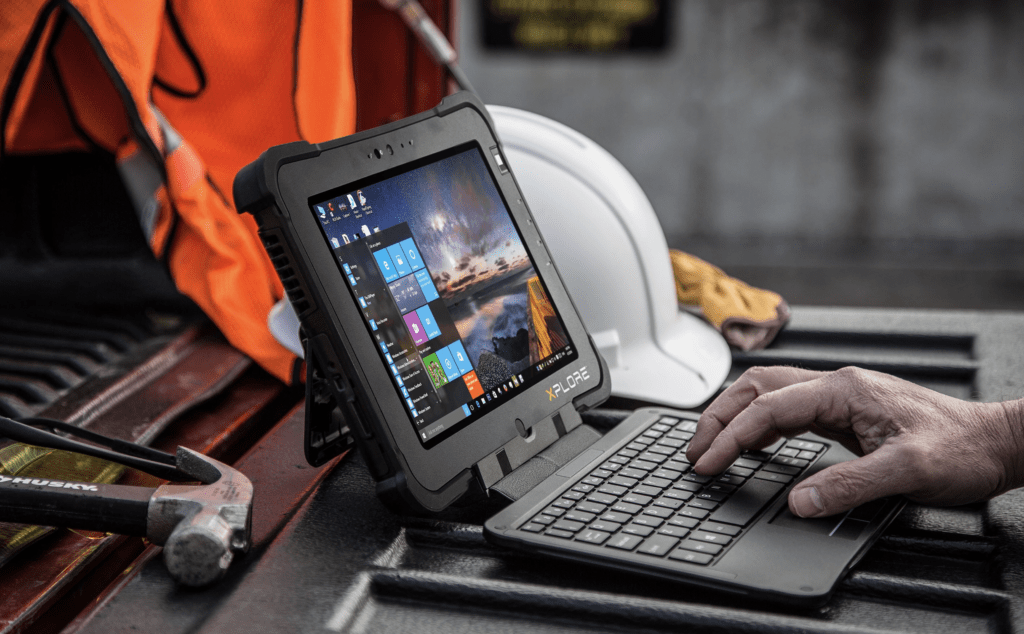
The third and final offering from Zebra in their L10 series of Rugged tablets is their XBOOK 2-in-1 Rugged tablet. From just looking at the XBOOK it’s obviously different than the previous two offerings we just mentioned. It comes with a highly functional removal keyboard, the attached KickStrap on the back doubles as a kickstand or an ergonomically rotating hand strap. This is the most feature-rich of the three rugged tablet offerings from Zebra. It’s easy to why this is a perfect laptop replacement not to mention its durability and reliability. The XBOOK is perfect for Field Mobility, Oil and Gas, Telecommunications, Utilities, and Manufacturing Applications. If you would like to learn more about the Zebra XBOOK please contact us and we’ll get back to you ASAP!

Key Specs of the XBOOK L10 2-in-1 Tablet:

  • Dimensions: 11 in. x 8.3 in. x 2.36 in.
  • Outdoor Viewable and Night mode screen
  • Corning Gorilla Glass Damage Protection
  • IP65 Rating
  • Up to 27hr battery life with extended version
  • Hotswappable battery
  • Windows and Android OS
  • NFC, GNSS and 4G LTE, 802.11ac Wi-Fi
  • Bluetooth

Click here to see the XBOOK L10 Spec Sheet

The Zebra XBOOK L10 2-in-1 Rugged Tablet is all the tech of the previous two tablets put into one sleek 2-in-1 rugged device. Also, it is intrinsically safe for special applications whether you’re in a manufacturing plant or a warehouse you’ll be compliant with any special regulations. Overall, this is a great option for replacing your old heavy worn-out laptop. This XBOOK with its removable fully function keyboard and KickStrap on the rear makes it the best of both worlds whether you’re working from the tailgate of your truck or out on the job site it’ll be easier than ever to get work done.

The Bottomline:

If you’re tired of looking around for a 2-in-1 rugged tablet that can replace your laptop or just need a highly functional tablet look no further. This rugged tablet has everything you need to get the job done and more. If you are interested in learning more about the Zebra XBOOK 2-in-1 rugged tablet please don’t hesitate to contact us we’ll be more than happy to assist you with any questions you may have.

Bar Code Depot

We are an authorized reseller of Zebra products we’d love to help you find the right Rugged tablets for your needs. We are only a quick phone call or email away!

(706) 654-9090

cliffh@bcd4rf.net

Repairing LXE Scanners

LXE scanners, such as those in the 8500, 8800, 8900 and 8560 series, are the beating heart of many a warehouse management system.

The reason for this is their solid yet simple construction based around intuitive design and ergonomics. In other words, everything about LXE scanners feels right, and it is so simple to use that it almost becomes an extension of the operator’s hand.

If you are one of the many inventory managers that rely on LXE scanners, you know exactly what we are referring to. Now, imagine that, one day, you turn to that work horse and it does not respond…It’s a scary thought, right?

Well, despite the fact LXE produces some of the most reliable scanners available on the market, there is always that chance. And if and when that does happen, you are going to want to know who you can rely on to fix it. The good news is that repairing LXE scanners does not always require professional assistance. In fact, there are several troubleshooting steps you can take to ensure the problem is not a minor one that you may correct yourself. That said, there are still times when you will need heavy-duty professional assistance, and when that occurs, it is good to know who to trust.

More on that later…For now, let’s look at some steps that you may take should your LXE scanner falter.


BASIC LXE SCANNER MAINTENANCE

Just because your LXE scanner can survive the odd drop or shock without damage, does not mean that you can treat it carelessly and expect continued service. In fact, it behooves any LXE owner to treat their scanner with respect. That includes tending to its overall condition, including cleanliness – especially the condition of the scanner window.

Keep it clean

  • A dirty scanner window will lead to poor performance. In order to avoid this, simply clean the window with a soft cloth or lens tissue dampened with water (or a mild detergent and water solution). NOTE: If you do employ a detergent solution, make sure to then rinse the window with a clean lens tissue dampened with water only.
  • The same rules apply to the scanner housing and its base.
  • After cleaning, make sure to allow at least 10 to 30 minutes for any washed items to air dry before applying power.

Keep an eye on connections/cables

  • A badly worn cable (such as the power cable that supplies power to the base) or damaged connector may interfere with scanner operation. If either is damaged it must be replaced.
  • If you must replace an interface cable, please follow these steps when inserting the new cable in a corded scanner:
    • Turn the power to the host system “off.”
    • Disconnect the scanner’s cable from the terminal or computer.
    • Locate the small hole on the back of the scanner’s handle. This is the cable release.
    • Straighten one end of a standard paper clip.
    • Insert the end of the paper clip into the small hole and press in. This depresses the retention tab, releasing the connector. Pull the connector out while maintaining pressure on the paper clip, then remove the paper clip.

To replace an interface cable in a cordless scanner base, please follow these steps:

    • Turn the power to the host system “off.”
    • Disconnect the scanner’s cable from the terminal or computer.
    • Turn the base upside down and locate the pinhole for the cable release and insert a straightened standard paper clip.
    • Pull the connector out while maintaining pressure on the connector release clip.
    • Replace the new cable
    • Insert the connector into the opening and press firmly. The connector is keyed to fit in just one way and will click into place.

Sometimes, simple maintenance is not enough, however. If these solutions do not solve your problem, take the next step up to more intensive troubleshooting.

Repairing Symbols

LXE SCANNER TROUBLESHOOTING

  • Repairing LXE scanners may be as simple as repairing the material which it is designed to scan. In other words, the problem may not be the scanner itself, but the bar code that you are scanning or the manner in which you are scanning it.


With that in mind, let’s take a look at some of these potential problems.

  • Problem: Selected bar codes will not scan
    • Potential solution: Barcodes on the printed page are too compact to be scanned – especially with a long-range scanner.
    • How-to: There is a difference between laser printer types and how they handle some Adobe Acrobat print functions – specifically, the “shrink to fit” option on the Print Options screen. Therefore, before clicking “print,” make sure the “shrink oversized pages to paper size” checkbox is unchecked. If the barcode is still too small to be read by the scanner engine, run the printed page through the laser printer again using the laser printer’s “zoom” feature until the barcode is large enough to scan satisfactorily.


  • Problem: Scanner beeps following a successful decode
    • Potential solution: Audible scan progress indicators are generated by the scanner driver on LXE mobile devices not the tethered decoder engine.
    • How-to: Use the Windows CE Control Panel options to set up the mobile device audible indicators.


  • Problem: Beeper tone/beeper volume
    • Potential solution: Audible scan progress indicators are generated by the scanner driver on LXE mobile devices, not the ring decoder engine.
    • How-to: Use the Windows CE Control Panel options to set up the mobile device audible indicators.


  • Problem: Event Reporting
    • Possible solution: LXE mobile devices with linked scanners aren’t designed to process events triggered by the linked scan engine. Events are processed by the operating system resident on the mobile device.
    • How-to: Use Windows CE Control Panel options to set up the mobile device event reporting parameters.


  • Problem: Scan not registering
    • Potential solution: The range of a scanner is dependent upon many outside influences including size of the barcode, quality of the barcode printing, material the barcode is printed on and angle of the beam aperture relative to the barcode label.
    • How-to: Any of these factors may result in having to re-scan the label from a different distance or angle. Try altering the angle of your scan or re-printing the bar code.


  • Problem: Barcode Quality
    • Potential solution: Check the barcode for marks or physical damage such as ripped label, missing section, correct size for the scanner being used, etc.
    • How-to: Generally, the bigger the barcode the further the distance from which it can be read. If the barcode is smaller than the specified size for the scanner being used, the distance, in almost all cases, will shrink. Hold the scanner closer to small barcodes (or with in barcodes in which the bars are grouped tightly together). Do not position the scanner exactly perpendicular to the barcode being scanned. In this position, light can bounce back into the scan aperture, and possibly prevent a successful decode.


  • Problem: Barcode symbology
    • Potential solution: Barcodes such as UPC codes and Code 128 are more complex than Code 39 and Interleaved 2 of 5.
    • How-to: When attempting to get the maximum read distance possible, particularly with reflective labels, use Code 39. The use of Code 128 or other more complex symbologies will almost always result in a reduction in maximum read distance. LXE will not support scanner maximum distances (from Decode Zones) when symbologies other than Code 39 are used.


  • Problem: Ambient lighting
    • Potential solution: High ambient conditions, particularly outdoor environments, will produce enough light to somewhat “blind” the scanner. This will result in shorter read distances.
    • How-to: Ensure that you arescanning in dimmer conditions.

LXE Scanner being used in the warehouse

  • Problem: Temperature
    • Potential solution: While small deviations from room temperature will have no impact on scanner performance, severe conditions like those found in freezers will have a negative impact on both the distance scanners can read and the speed the read is acquired.
    • How-to: Some scanner engines contain protection circuitry that shuts the scanner down in temperatures that exceed the recommended operating temperature. Check your manual to determine these ranges.
  • Problem: Software updates
    • Possible solution: If a firmware update is interrupted due to a loss of power or by removing the cable before the update is complete, the original firmware will be destroyed, and the scanner will not be able to run in normal operation mode.
    • How-to: If this event occurs, the utility on the PC indicates that the firmware upgrade was not successful. This condition can be recovered by repeating the firmware update procedure.

DAMAGED LXE SCANNER SOLUTIONS

There are times – especially in the case of physical damage – when troubleshooting just will not solve your scanner problems.

If you find yourself in this situation, then it might be much more financially sound to have your scanner repaired or serviced rather than simply buy a new one.

In that case, Bar Code Depot is here to help.

Because of our extensive knowledge of the industry, we know that every minute spent dealing with damaged equipment sets off a chain reaction that adversely effects everything else. Therefore, we are here to provide all of your barcode equipment repair needs – including for all LXE scanners.

We conduct all of our repairs with an eye for speed and cost. In fact, everything we do is designed to provide the biggest benefit to your bottom line. Using an original equipment manufacturer for repairs can mean big costs for you. But all of Bar Code Depot’s technical staff has worked for major OEMs (including LXE). That means we can offer the same level of expertise – without the costs associated with OEMs.

We do 90 percent of our repairs – including 100 percent of barcode scanner repair – in-house. This helps to keep costs down – a factor that we pass on to our clients.

Bar Code Depot provides free estimates on all repair jobs, so that you can decide whether it is better to repair or replace the scanner.

No matter your problem with any LXE scanner we can solve it. Contact us for a quote today!


Contact Us Today


Holiday Rush & Leasing Equipment

Stacked packages in the back of a truckThere is no time to waste, the holiday ordering and shipping rush is already in full swing. And for the inventory management industry, that means all hands on deck for the next several weeks.

In other words, this is the time of year in which you cannot afford to fall behind. So many of us gear our entire calendar around the holiday rush, as it is the timeframe which can stretch your resources and make or break your warehouse management systems. If you have any misgivings about the data collection equipment on which you rely to get your job completed efficiently and successfully, then there is no time to waste. Whether you simply need more devices or need to step up the technology you have on hand, you must sort out the situation immediately – or face potentially disastrous consequences.

The good news is that, thanks to Bar Code Depot’s leasing options, there is no need to purchase more data collection equipment than you would normally require. In fact, leasing may represent the most sensible option for any inventory management organization, especially during busy holiday months.

There is no value in unused equipment, and that most certainly includes data collection equipment. So, let’s say that previous holiday rush deadlines and volume proved too much for the equipment you have on hand to handle. The natural response is to go out and buy enough equipment to ensure that you do not get caught short again. But what happens when the holiday rush is over? What service do all those extra business tools provide to you when they are not needed? Sure, it’s great to know that you can handle oversized jobs when tasked. But, otherwise, you’re wasting money by purchasing equipment that may prove unnecessary for months at a time.

Whether it is scanners, handheld and/or vehicle mounted computers, or printers, there are so many options that could provide the technological boost and support that you need to ensure a smooth holiday season. And, once the holiday season is complete, you simply return those unnecessary pieces of equipment.

It is also important that you find the exact equipment that you seek, as well as the brand and quality that you trust at a price point that makes sense for your budget.

At Bar Code Depot, we understand all of aspects of the inventory management industry. In fact, we’ve built our business on providing the most cost-effective and flexible solutions for warehouse managers. And that is why we offer leasing options that can provide every remedy that you need – at the price and timescale that makes the most sense for you. Even if you require large amounts of equipment, we can handle the demand. In fact, we even offer special discounts for bulk orders.

We offer leading options on a whole range of data collection equipment manufactured by the leading names in the industry, including Zebra/Motorola, Honeywell/LXE and Datalogic. And because we understand the strains experienced by warehouse managers during this time of year, we are always happy to work with you to get exactly what you are after – both in technological capability and cost.

No matter your needs, you can rest assured that you will receive equipment capable of handling the job, as all warehouse inventory tools that we sell or lease come with a guarantee of service.

Do not let the holiday rush overwhelm you. No matter your needs, we are here for you. Contact us and get back on top of your inventory now. We built our reputation on customer service, and one call or email to our service department will reveal why. Contact us today!

Contact Us Today


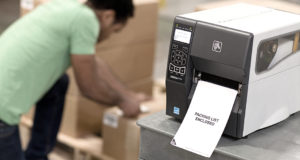
How to Repair Common Zebra QL420 Plus Mobile Printer Issues

The Zebra QL420 Plus is a great mobile printer for many business applications where you need a tool that can be versatile in the field. This little printer can be mounted in a number of ways to different vehicles or held by hand, and it has an LCD screen with a monochrome interface. Businesses use it for printing shipping labels, making inspection documents, and a host of other uses. Other features for this printer include Secure several wireless options, IP address monitoring, and it can print direct thermal.

Area shot of a warehouse

It’s also not a device that will be outdated anytime soon because it maintains a

variety of connections and interfaces, including the following capabilities:
• USB
• Bluetooth
• 802.11b/g
• Serial


But if you’ve got one of these and your business depends on it functioning properly, it may be worth your time to familiarize yourself with a few easy fixes. In some cases, you can get it up and running yourself.


Common Issues and Troubleshooting Assistance
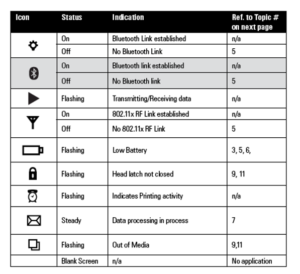
There are some easy and obvious things you should try before you pay for a technician to help you fix your printer. Many of them you may be able to resolve yourself. First, it’s helpful to familiarize yourself with these icons below Zebra support page. These tables and symbols can help you better analyze what the issue is and what to try next.

Table 1: Symbols

Picture of symbols of a bar code scanner


Table 2: Blinking Signals

Studying these charts and signals may be able to help you troubleshoot common issues and play around with the settings. For more detailed information, visit the Zebra support page for more troubleshooting, specs, or driver downloads.

Picture of symbols of a bar code scanner


Driver Issues
We all know that a device is only as good as its software and driver. And they need to be updated and compatible with any other devices you’re using it with. Some user reviews online have found the install software challenging. Others have said it is kind of slow at times. Depending on what type of connectivity you are using (USB, 802.11x, etc.), make sure all your devices are powered on, have an ample power source, and that all the correct software is installed. It’s possible the driver is the problem if it’s not connecting properly. Make sure that you have the most up-to-date and accurate driver for your printer, and those drivers can be found on Zebra’s support page here:

Keep in mind that for some older models, Zebra may have phased out some of their support.

How to Load Paper for the Zebra QL 420
It sounds simple, but if this is the first time you have loaded paper to your printer or are having trouble re-loading paper, here are 8 basic instructions for how to load a new roll of paper to begin or resume printing:

1. Power on
2. Enter password (found in manual)
3. Set the media type
4. Push the release button and open the printer
5. Make sure you have the correct paper roll (with black timing marks)
6. Load labels between adjusters (think about a toilet paper roll)
7. Close printer with some extra paper hanging out
8. Next, calibrate the tool on the settings/home key

Calibration Errors
If you’re having trouble with paper messing up, the labels skipping, or printing in the wrong location, it’s possible you have the printer mis-calibrated. It’s also possible that it’s calibrated correctly but for a different media type. Effective printing must match the media type. In order to check on the current configuration settings, do the following:

o Turn off printer
o Press and hold feed button
o While still holding the feed button, press and release the power button
o When it starts to print, release the feed button
o The device will print 2 reports.
o If it doesn’t print a 2nd report, then no application is loading

For some newer models like the QLN 420, you can calibrate the printer another way. From the home menu, scroll through to the following:

o Set up menu
o Tools
o Scroll to the right
o Label length calibration
o Start button

Mounting Issues with Your Zebra QL 420
Let’s say you want to mount your printer to a forklift or work vehicle. Or perhaps you realize that you put it on quickly to a vehicle and it’s not easy to service or provide maintenance because of its location. You want to make sure you install the mount correctly so the printing is easy and not blocked. The mounting accessories are sold separately from the printer, and it can be positioned vertically or horizontally. The main two issues to watch out for are that you need to mount it in a location and angle that allows ample space for loading and reloading paper, and that you can open it up and clean it from time to time. If you are having a hard time reloading paper or using your device on a regular basis, you may want to find a mounting location that better suits daily use.

Broken LCD Screen
The screen is an essential part of this printer, so if it’s cracked but still usable, that’s one thing. However, if it seems glitchy or you can see it well enough to use your device (or make changes on the menu keys), it’s best to let a professional technician fix it.

Conclusion
There are many simple things that a user can do on their own, including checking the power supply, re-calibrating the machine, loading paper, updating drivers, and even mounting it to your vehicle. But for more advanced functions or software problems—or maybe you’ve tried all these and you’ve simply exhausted your energy or time trying, give us a call and we’ll be happy to get your machine up and running again. These little printers can provide years of great service if you keep them well-maintained.


Contact Us Today


Repairing Honeywell Scanners

For years, Honeywell/LXE has produced some of the most reliable and easy-to-use technology in warehouse management systems.

Fully integrated systems combine with ergonomic design to make Honeywell/LXE scanners both intuitive and versatile. And their solid structure can also make them a workhorse in any warehouse manager’s arsenal.

However, even the most vigorous workhorses occasionally require some upkeep – sometimes they even need minor or major repair. Most of the time you can manage this on Honeywell/LXE scanners with simple knowhow, but there are occasions when you must make a determination on whether to seek outside help for a malfunction. If and when you do cross that road, it’s a good idea to know who to trust with repairs – an ally that will not only do the job effectively but at a price that makes repair worthwhile over replacement.

But before you get to that point, let’s take a look at some of the troubleshooting that you can handle on your own.


BASIC HONEYWELL/LXE SCANNER MAINTENANCE

As with any piece of technology – even one that is meant to be handled and is as tough as a Honeywell/LXE scanner – you do have to be mindful of its overall condition. This includes its cleanliness, specifically the scanner window.

Reading performance may degrade if the scanner’s window is not clean. Therefore, if the window is visibly dirty, or if the scanner isn’t operating well, clean the window with a soft cloth or lens tissue dampened with water (or a mild detergent and water solution). If you do employ a detergent solution, make sure to then rinse the window with a clean lens tissue dampened with water only.

You may also clean the scanner and base’s housing in the same way.

Allow at least 10 to 30 minutes (depending on ambient temperature and humidity) for any washed items to air dry before applying power to cradle.

Your scanner and its base housing cables and connections must also be continually inspected for wear or other signs of damage. A badly worn cable or damaged connector may interfere with scanner operation. If either is damaged it must be replaced.

If you must replace an interface cable, please follow these steps when inserting the new cable in a corded scanner:

  • Turn the power to the host system “off.”
  • Disconnect the scanner’s cable from the terminal or computer.
  • Locate the small hole on the back of the scanner’s handle. This is the cable release.
  • Straighten one end of a standard paper clip.
  • Insert the end of the paper clip into the small hole and press in. This depresses the retention tab, releasing the connector. Pull the connector out while maintaining pressure on the paper clip, then remove the paper clip.

To replace an interface cable in a cordless scanner base, please follow these steps:

  • Turn the power to the host system “off.”
  • Disconnect the scanner’s cable from the terminal or computer.
  • Turn the base upside down and locate the pinhole for the cable release and insert a straightened standard paper clip.
  • Pull the connector out while maintaining pressure on the connector release clip.
  • Replace the new cable
  • Insert the connector into the opening and press firmly. The connector is keyed to fit in just one way and will click into place.

Next, let’s move beyond maintenance and take a look at troubleshooting.

Forklift in a warehouse

HONEYWELL/LXE SCANNER TROUBLESHOOTING

If you run into any problems with your Honeywell/LXE scanner, please attempt these quick fixes before proceeding to the next step and contacting a professional for further help.

First, understand that your scanner automatically performs self-tests whenever you turn it on, so it should alert you to any issues any time it is turned on.

Next, you should always keep your software up to date on your scanner, and you can ensure that you have the latest versions installed by visiting honeywellaidc.com to check for the latest software.


OK, now let’s look at these relatively simple troubleshooting solutions – first, we’ll look at corded scanners.


Power solutions

The absolute first step is always the simplest. Is the power “on?” Yes, I know this seems downright silly, but you would be surprised how many times people have forgotten to check this step.

Next, ensure that the laser aimer is turned “on.”

If the laser aimer is still not illuminated, ensure that the cable is connected properly, the host system power is “on” (if external power isn’t used) and that the laser button itself works.

Symbol reading problems

If the scanner isn’t reading symbols properly, check that the scanner window is clean and that the symbols aren’t smeared, rough, scratched, or exhibiting voids. Also, be sure there are no water droplets on the surface and that the symbols are enabled in the scanner or in the decoder to which the scanner connects.

Barcode is displayed but not entered

If the barcode is displayed on the host device correctly but you still have to press a key to enter it, then you need to program a suffix. Programming a suffix enables the scanner to output the barcode data plus the key you need to enter the data into your application.

Scanner won’t read a barcode

If this happens, scan sample barcodes that you know work. If those read, then make sure the scanner that won’t read is not damaged or compromised by water droplets. Next, make sure that your bar code symbology is enabled.

Next, let’s look at some troubleshooting for a cordless system, starting with the base:

Red LED is not illuminated

First, check to see if the power cable is connected properly and that there is power at the power source. Next, ensure that the host system power is “on” (if external power is not utilized).

Green LED is not illuminated

First, check that the scanner is correctly placed in the base. Next, check to see if there is external power or host power and then ensure the contacts are clean. (For Voyager 1202g only: ensure that the charge mode is turned “on.” And then ensure the battery is not bad or deeply discharged. In some cases, the scanner’s battery may slowly lose its charge to bring it into an acceptable level and then transition to a normal charge cycle.)


Next, let’s take a look at the cordless scanner itself. First, ensure that your scanner’s battery or instant charge pack is, in fact, charged.


Scanner has trouble reading symbols

If your scanner is not reading symbols well, check that the symbols are not smeared, rough, scratched, or exhibiting voids. You should also ensure the symbols are not coated with any frost or water droplets on the surface. You should also ensure that symbols are enabled in the base or Access Point to which the scanner connects.

Barcode is displayed but not entered into the application

Understand that if the barcode is displayed on the host device correctly, you still have to press a key to enter it (the Enter/Return key or the Tab key, for example). In order to make sure that it works correctly, you must program a suffix. Programming a suffix enables the scanner to output the barcode data plus the key you need (such as “CR”) to enter the data into your application.

Scanner won’t read barcode at all

First, scan the sample bar codes that you know are reading. If the scanner reads the sample bar codes, check that the troubled bar code is not damaged or compromised by something such as water droplets. Next, verify that your bar code symbology is enabled.


DAMAGED HONEYWELL/LXE SCANNER SOLUTIONS

As an oft handled and workhorse piece of equipment, there are times when your Honeywell/LXE scanner may suffer physical damage.

If you find yourself in this situation, then it might be much more financially sound to have your scanner repaired or serviced rather than simply buy a new one.

In that case, Bar Code Depot is here to help.

We understand that every minute that you deal with damaged equipment effects everything in your company. Therefore, we are here to provide all of your barcode equipment repair needs – including for all Honeywell/LXE scanners – with a speed that will get your equipment back online as fast as possible.

All of our repairs also come at a cost designed to provide the biggest benefit to your bottom line. We understand that going to the original equipment manufacturer can ring up sizable repair bills in short order. And you might think it is worth it for the amount of expertise they possess.

At Bar Code Depot, however, all of our technical staff has worked for major OEM’s (including Honeywell/LXE) and we are up to date on all of the latest technology in the field of barcode scanners and warehouse management systems.

We also do 90 percent of our repairs – including 100 percent of barcode scanner repair – in-house. This is why we are able to make repairs with utmost speed. It also allows us to do it at a lower cost – something that provides savings to our customers.

Bar Code Depot also provides all of our customers with free estimates on all repair jobs, so that you can decide what’s best for you – whether to go ahead with repairs or replace the unit.


No matter your problem with any Honeywell/LXE scanner we can solve it!

Contact Us Today
 

Troubleshooting Common LXE MX7 Terminal Problems

One of the popular models of barcode terminal we sell and repair is the Honeywell MX7 and MX7T. Now, in case you’re confused about your model, this model was formerly the LXE MX7. Honeywell acquired LXE’s parent company in 2011.

These models are a high-performing wireless barcode terminal / mobile computer with a lot of great features. They offer voice command options and an easy-grip handle. It operates on a Windows OS and offers ample storage in both ram (128MB) and flash memory (1GB-4GB). This terminal comes with keypad options of both 55 and 32 keys. This model has an LED backlight and a 3.5” VGA TFT color display. It also has a resistive touch screen and stylus pen. It offers a cordless option through the use of 802.11b/g radio & Bluetooth connectivity, as well as USB and RS-232 interfaces for additional connections. The MX7 uses a rechargeable lithium-ion battery. And while this model isn’t quite as rugged as some of the bar code terminals in terms of temperature range, but it can endure some drops of 5ft. and 6ft.

Troubleshooting Common Problems

There are normal issues that business owners need to watch out for, and a few tips you can try before you get a professional to help you out. This article won’t cover every issue you may face, but it can help you better understand your machine and how to fix simple issues. If you have a serious issue, like a cracked screen or an unresponsive stylus, you may want to reach out to a professional technician. But for minor issues and issues that you can do yourself and save a bill, read on.

Blinking LED Lights: Should I be Concerned?

This terminal is designed to blink. But what does it all mean? The MX7 has an LED light that blinks to communicate with users any possible issue that is arising. Sometimes you just want to know what’s going on and what each signal means. Here are some color codes from the manual and what they indicate.

For the System Status Update
• Red Blinking – This means a power failure. Replace the battery or plug in to the power source.• Red Steady Light – This warning sign means the main battery is low.
• Green Blinking – This just means the Display is off. Nothing to do.
• No Color – The MX7 is either fully on or in Suspend mode. 

Warehouse loader unloading a load of boxes from a trailer

For Scanning Status
• Steady Green – This means a good scan has occurred.
• Steady Red – The scan is in progress.
• No Color – This means the imager is ready for use
• Steady Amber – The bar code decoder images is changing settings/parameters

Alpha Mode
• Steady Green – This means the 32-key is in Alpha character input mode
• No Color – This means the 32-key is in Numeric input mode

Power Issues

Strain Relief Clamps. If your power isn’t working well, or maybe it goes on and off intermittently, check to make sure the cord is connected firmly to the computer console. Over time, the way the machine was installed and the arrangement of the power cords can work loose or damage connectors. That’s why Honeywell designed the strain relief clamps to help provide tension relief on the connection. If yours is loose or wiggly, it may be this is your main issue.

Battery Charger Won’t Work Right. There are several issues that could be going on here. As the manual explains, sometimes the charger doesn’t fit in the pocket correctly, or the LED may be on without a battery pack. At other times No LEDs will fire up or the LED is flashing red in any pocket. For any of these types of issues, be sure and check to make sure you have the correct manufacturer approved battery pack, that dirt or other objects aren’t in the charging pocket, or that the battery pack is making good contact with the battery. In some cases, the battery may be old and the cells may have exhausted their lifespan.

Other Minor Problems and Solutions

Unit Either Won’t Power On or It Freezes Up
Sometimes the unit won’t power up correctly or gets locked up for a while. You may have to do several things to get things back up and running. First, make sure the unit has a fully charged battery, or is firmly seated in the docking cradle with a corded power supply. Next, try a hard reset by holding the power key for 30 seconds. Power the device back up again. When the system starts to boot up, hold down the “A” key until you see “loading from SD” or “Warning do not remove power.” The manual says that if this doesn’t fix the issue, then you need to take it to a professional repair shop.

Desktop Cradle Breaks
The MX7 manual is clear that you there “are no serviceable parts in the MX7 Tecton Cradles.” Honeywell doesn’t recommend opening these units up. If your cradle becomes cracked or broken, you need to get a professional to replace that for you with a new cradle. We don’t advise doing this one yourself.

You Run out of Storage or Need to Upgrade
If you run out of storage for data, you may want to make full use of the expansion slot for SD memory. This is like your basic SD card, and Honeywell offers 1GB and 4GB cards. Don’t let a lack of storage space slow you down. This flash memory can also help you make upgrades to your operating system.

Change Global Settings
Sometimes you need to tweak the settings of your MX7. In order to do this, you first need to be in Admin mode to change any of these settings. If roam trigger, channel set, DFS scan time, frag threshold, admin password, auth server, and many more mean anything to you, then check out the Global Settings tab. You may be the kind of person who likes to tweak every setting, and this is the place to do it.

“Diags” Screen
This particular screen helps you troubleshoot network issues and radio connectivity. You can use the Reconnect button to authenticate the wireless Lan, get a new IP address, start a continuous ping, gather data information about the radio and profile settings, and save the diagnostics to a file.

Conclusion
For some of these simple issues described above, there may be some things you can try before you pay someone to fix it, and it may be that you just need to learn how to operate your machine at a deeper level. But there are obvious issues that we haven’t covered here, such as cracked screens, an unresponsive screen or one that won’t work with the stylus, or frequent drops that have generated errors and internal problems. For the most part, these issues are best left to a professional technician. If you’re in that position, or you’re just not sure, give us a call and we’ll help you get your terminal back up and running.

Contact Us Today


Zebra Barcode Scanners: A Reputation of Excellence

Zebra barcode scanners have built a reputation of excellence for a reason. Reliable, easy to use and a leader in the industry for years, Zebra is a key component for so many successful warehouse managers.

However, even these workhorse machines can run into problems and mishaps. And there are times when you need to repair them. Proper maintenance is also key in keeping your Zebra running at full speed.

That said, maintenance is as simple as cleaning the exit window. That’s it. Nice, huh? However, do not forget about this facet, as a dirty window can affect scanning accuracy.

In order to ensure a clean window:

  • Do not allow any abrasive material to touch the window
  • Remove any dirt particles with a damp cloth
  • Wipe the window using a tissue moistened with ammonia/water
  • Do not spray water or other cleaning liquids directly into the window

Now, let’s take a look at some of the other problems that can occur. These go beyond maintenance and cover simple repair. Commonly, malfunctions with Zebra scanners may be solved by in-house troubleshooting and fixes. Following are procedures to help you through a number of possible issues:

Power concerns

If nothing happens when you follow the operating instructions, or the scanner displays erratic behavior (for instance, the laser does not come on, or the scanner emits frequent beeps), then check your power connections for loose cables and make sure that your power supply is fully connected.

Decoding concerns

If the laser on your Zebra scanner comes on, but the symbol does not decode, then you may not have your scanner programmed to read the type of bar code you are scanning. Ensure that your scanner is programmed to read that specific type of bar code you are scanning.

The bar code itself may also be damaged or defaced. In order to determine if this is the issue, try scanning test symbols of the same bar code type.

Another issue is that you may be trying to scan the bar code from too far away. Try moving closer and re-scanning. It may be as simple a fix as that.

Transmission concerns

If your Zebra scanner is decoding symbols but not transmitting them to the host, you may be facing a programming issue. In order to correct this issue, ensure that you scan the appropriate host type bar code.

Display concerns

If the data that you scan displays incorrectly on the host, your scanner may not be correctly programmed to work with the host. In order to ensure that it is, check your scanner host type parameters or editing options. Be sure proper host is selected. And be sure that editing options (such as ADF, UPC-E to UPC-A Conversion) are properly programmed.

Software concerns

As with any modern technology, there are software updates, including iOS updates. So ensure that all of these have been installed and updated.

There are even more serious/in-depth issues with scanners that occasionally pop up. For instance, if the scanner lens becomes scratched or damaged in any way, then your Zebra must be repaired. And since scanners are constantly being handled and used, they are quite likely to suffer drops and bumps that could end up knocking something loose or scratching the lens.

If you find yourself in this situation, knowing that your Zebra still has many more years of serviceable life but for a specific issue, then it might be much more financially sound to have your scanner repaired or serviced rather than simply buy a new one.

In that case, Bar Code Depot is here to help.

We understand that every minute that you deal with damaged equipment effects everything in your company. Therefore, we are here to provide all of your barcode equipment repair needs – including for all Zebra barcode scanners – with a speed that will get your equipment back online as fast as possible.

All of our repairs also come at a cost designed to provide the biggest benefit to your bottom line. We understand that going to the original equipment manufacturer can ring up sizable repair bills in short order. And you might think it is worth it for the amount of expertise they possess.

At Bar Code Depot, however, all of our technical staff has worked for major OEM’s (like Zebra/Motorola) and we are up to date on all of the latest technology in the field of barcode scanners and warehouse management systems.

We also do 90 percent of our repairs – including 100 percent of barcode scanner repair – in-house. This is why we are able to make repairs with utmost speed. It also allows us to do it at a lower cost – something that provides savings to our customers.

Bar Code Depot also provides all of our customers with free estimates on all repair jobs, so that you can decide what’s best for you – whether to go ahead with repairs or replace the unit.

No matter your problem with any Zebra barcode scanner we can solve it.

Contact Us Today